History of Fingerprinting
~1000-2000 B.C. - Fingerprints were used on clay tablets in ancient Babylon.

3rd Century B.C. - Thumbprints begin to be used in China to “sign” documents.


14th Century A.D. - Many official government documents in
Persia have fingerprint impressions. Government physician makes the
observation that no two fingerprints were an exact match.
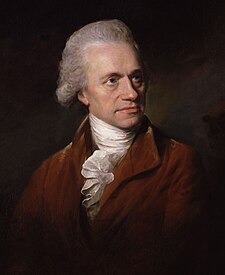
1686 - Marcello Malpighi notes the common characteristics of spirals,
loops and ridges in fingerprints, using the newly invented microscope for his
studies.He mentions no value to use of it as an identification method.

1823 - Johannes Evengelista
Purkinje details a full nine different fingerprint patterns. Still not mentioned ton use as an identification
method.

1858 - Sir William Herschel, first used fingerprints to “sign”
contracts with native Indians. He noted that it could be used as an identification method.
1880 - Dr. Henry Faulds published an article in the
Scientific Journal, "Nautre" (nature). He discussed fingerprints as a
means of personal identification, and the use of printers ink as a method for
obtaining such fingerprints.

1882 - Gilbert Thompson uses his own fingerprints on a document to guard against
forgery. This event is the first known use of fingerprints for identification
in America.

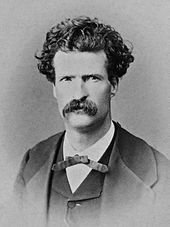
1883 - Mark Twain,
tells the story of a murderer who is identified by the use of fingerprints.
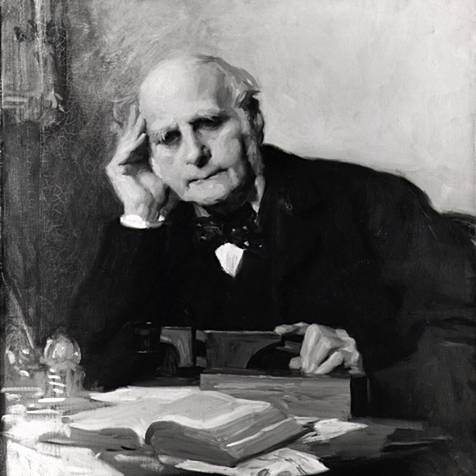 1888 - Sir Francis Galton’s became the first to
provide scientific evidence that no two fingerprints are exactly the same, and
that prints remain the same throughout a person’s lifetime.
1888 - Sir Francis Galton’s became the first to
provide scientific evidence that no two fingerprints are exactly the same, and
that prints remain the same throughout a person’s lifetime. 1892 - Galton detailed the first classification system for fingerprints; he identified three types (loop, whorl, and arch) of characteristics for fingerprints (also known as minutia).
1892 - Juan Vucetich made the first criminal fingerprint identification. Vucetich eventually developed his own system of classification.

1896 - British official Sir Edward Richard Henry instituted a fingerprinting
program for all prisoners.

1902 - Alphonse Bertillon is responsible for the first criminal
identification of a fingerprint without a known suspect.
1903 - Fingerprinting technology comes into widespread use in the United States.

1905 - The U.S. Army begins using fingerprints
as personal identification methods.

1911 - The first central storage location for fingerprints
in North America is established in Ottawa by Edward Foster of the Dominion
Police Force.

1924 - The U.S. Congress acts to establish the
Identification Division of the F.B.I.

1990s - AFIS is a computerized system
storing and cross-referencing criminal fingerprint records.

1996 - Chris Migliaro founds Fingerprint America in Albany, NY. The
company provides a simple, at-home fingerprinting and identification kit for
parents.

1999 - The FBI phases out the use of paper fingerprint cards
with their new Integrated AFIS (IAFIS) individual computerized fingerprint records.

*http://www.fingerprintamerica.com/fingerprinthistory.asp
~~~~~~~~~~~~~~~~~~~~~~~~~~~~~~~~~~~~~~~~~~~~~~~~~~~~~~~~~~~~~~~~~~~~~~~~~
Types of Fingerprints
There are three
main types of fingerprints: visible prints, latent prints and impressed prints.

Latent prints are prints that are left behind by a medium not visible to the human eye made of sweat leaving behind water, salt, amino acids and oils. That can be developed to be seen by dusting, fuming or chemical reagents.
Impressed
prints (plastic prints) are prints left by indentations in material like clay, wax, paint or another surface that will take the
impression. These are visible to the human eye.
*http://www.odec.ca/projects/2004/fren4j0/public_html/types_prints.htm
*http://www.vetmed.vt.edu/education/curriculum/vm8054/labs/lab14/IMAGES/FINGERPRINT.jpg
~~~~~~~~~~~~~~~~~~~~~~~~~~~~~~~~~~~~~~~~~~~~~~~~~~~~~~~~~~~~~~~~~~~~~~~~~*http://www.vetmed.vt.edu/education/curriculum/vm8054/labs/lab14/IMAGES/FINGERPRINT.jpg
Techniques/Chemicals used to develop prints on nonabsorbent, porous, hard, and smooth surfaces
Porous Surfaces
• D.F.O.
• 1,2
Idanedione
• Ninhydrin
• Iodine
Fuming
• 5-MTN
• Physical
Developer
• Zinc
Chloride
Non-Porous Surfaces
•
Cyanoacrylate Ester
• Gentian
Violet
• Small Particle
Reagent
Glossy Paper
•
Cyanoacrylate Ester
• Small
Particle Reagent
• M.B.D Dye
• Basic Yellow
40
Metal
•
Cyanoacrylate Ester
• M.B.D. Dye
• Basic Yellow
40
• Small
Particle Reagent
Plastic
•
Cyanoacrylate Ester
• M.B.D. Dye
• Basic Yellow
40
• Small
Particle Reagent
Glass
•
Cyanoacrylate Ester
• M.B.D. Dye
• Basic Yellow
40
• Small
Particle Reagent
Unfinished Wood
• Iodine Fuming
• 1,2
Idanedione
• 5-MTN
• Physical
Developer
• D.F.O.
• Ninhydrin
• Silver
Nitrate
Wet Surfaces
• Physical
Developer
• Small
Particle Reagent
• Sudan Black
Adhesive Tape
• Gentian
Violet
• Liqui-Drox
• Liqui-Nox
• Sticky-Side
Powder
Post-Ninhydrin
• Nickel
Nitrate
• Physical
Developer
• Silver
Nitrate
• Small
Particle Reagent
• Zinc
Chloride
Multi-Colored Surfaces
(Fluorescent Techniques)
• R.A.Y.
• Ardrox
• M.B.D. Dye
• Basic Yellow
40
• M.R.M. 10
• Liqui-Drox
• Rhodamine 6G
• D.F.O.
• Safranin O
• Nile Red
• 1,2 Idanedione
• Thenoyl
Europium Chelate
• R.A.M.
Ultra-Violet Induced
• Ardrox
• Liqui-Drox
• Ultra-Violet
Lamp
• Silver
Nitrate
• Thenoyl
Europium Chelate
• Basic Yellow
40
Post-Cyanoacrylate
• Ardrox
• Basic Yellow
40
• M.B.D. Dye
• Nile Red
• Rhodamine 6G
• Sudan Black
• Basic Red 28
• Liqui-Drox
• M.R.M. 10
• R.A.M.
• R.A.Y.
• Thenoyl
Europium Chelate
Cartridge Cases
• Basic Yellow
40
•
Cyanoacrylate Ester
Blood
• A.B.T.S.
• Amido Black
– Water
• Crowle’s
Double Stain
• Leucocrystal
Violet
• Coomassie
Blue
• Amido Black
– Methanol
• D.A.B.
Non Destructive Techniques
• Iodine
Fuming
•
Electrostatic Lifting
• Visual
Examination
• Fluorescent
Light
•
Ultra-Violet Lamp
*http://www.odec.ca/projects/2004/fren4j0/public_html/developing_reagents.htm
~~~~~~~~~~~~~~~~~~~~~~~~~~~~~~~~~~~~~~~~~~~~~~~~~~~~~~~~~~~~~~~~~~~~~~~~~
Basic Shapes/ patterns of fingerprints
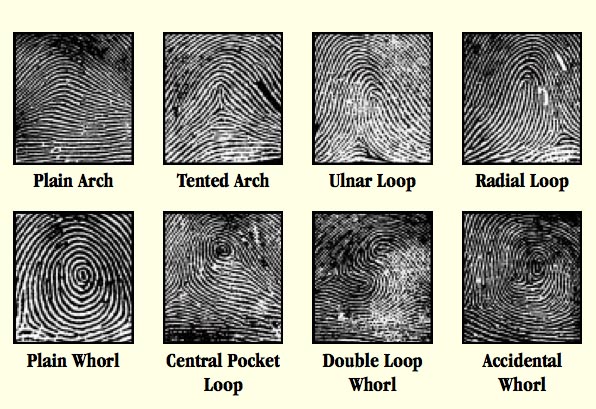
There are three main fingerprint patterns: arches, loops and whorls.
- Arches
- Are found in about 5% of fingerprint patterns encountered.
- There are four types of arch patterns:
- plain arches
- radial arches
- ulnar arches
- tented arches
- Loops
- Occur in about 60-70 % of fingerprint patterns encountered.
- There are two types of loop patterns:
- Radial loops
- Ulnar loops
- Whorls
- Are seen in about 25-35 % of fingerprint patterns encountered.
- There are four types of whorl patterns:
- Plain whorls
- Central pocket loop whorls
- Double loop whorls
- Accidental whorls
*http://viewzone2.com/fingerprint1.jpg
~~~~~~~~~~~~~~~~~~~~~~~~~~~~~~~~~~~~~~~~~~~~~~~~~~~~~~~~~~~~~~~~~~~~~~~~~
Procedures for collecting/lifting prints
- Once the fingerprints are developed and photographed you can use one of the lifting techniques: hinge lifters, rubber lifters and cellophane tape.
%5B1%5D.jpg)
- Hinge lifters
- Come in many different color backgrounds to allow development with different color powders.
- The hinge lifter is placed on the print and pressed down evenly.
- The lifted print is covered with the hinged cover to protect it from harm
- Using a roller you smooth out the bubbles
- An image of the fingerprint is obtained just as it was found.
 Rubber lifter,
- Carefully remove plastic cover in one steady movement.
- Apply adhesive side to the powdered print
- Pressed down evenly
- Remove rubber lifter in one steady motion.
- Replace plastic cover for protection.
- A negative image of the fingerprint is obtained.
- Cellophane tape
- Can be used on surfaces that aren’t flat.
 Covered the print area about an inch beyond in each
direction.
Covered the print area about an inch beyond in each
direction. - Gently rub over the print.
- Lift the print by pulling the tape gently and evenly away from the surface.
- The tape must be quickly applied to a card
- Lifted fingerprints in the correct position rather than reversed as on the rubber lifters.
**NOTE**Fingerprint lifts should have the date, hand, finger and
initials of the person lifting the print.
Example of developing and lifting fingerprints
*http://www.odec.ca/projects/2004/fren4j0/public_html/lifting_techniques.htm
*http://www.youtube.com/watch?v=tqFzVfPRd5s&feature=related
~~~~~~~~~~~~~~~~~~~~~~~~~~~~~~~~~~~~~~~~~~~~~~~~~~~~~~~~~~~~~~~~~~~~~~~~~
Hair and Fibers
History of hair/fiber analysis
1857- In France one of the first reports regarding the idea scientific study of hair introduced to the world
The field expanded rapidly after microscopic hair examination became known in the early 20th century.
1931- Professor John Glaister's "Hairs of Mammalia from the Medico-legal Aspect," became a renowned resource for hair analysis information
1977 - John Hick's "Microscopy of Hairs: A Practical Guide and Manual" laid out the groundwork for the use of hair evidence by the forensic examiner.
*http://www.ehow.com/about_6102496_forensic-science_-hair-fiber-analysis.html
~~~~~~~~~~~~~~~~~~~~~~~~~~~~~~~~~~~~~~~~~~~~~~~~~~~~~~~~~~~~~~~~~~~~~~~~~
Picture and labeled parts of a complete hair

*http://www.hshairclinic.co.uk/_images/hair_structure.jpg
~~~~~~~~~~~~~~~~~~~~~~~~~~~~~~~~~~~~~~~~~~~~~~~~~~~~~~~~~~~~~~~~~~~~~~~~~
Major types of fibers
Coarse wool

Orgin:
- Wool is a fiber that comes from sheep and other specific animals
- clothing
- blankets
- horse rugs
- saddle cloths
- carpeting
- felt
- wool insulation
- upholstery
- piano hammers
- absorb odors and noise from heavy machinery
- absorb noise from stereo speakers
Fine wool
Orgin:
- Wool is a fiber that comes from sheep and other specific animals
- clothing
- blankets
- horse rugs
- saddle cloths
- carpeting
- felt
- wool insulation
- upholstery
- piano hammers
- absorb odors and noise from heavy machinery
- absorb noise from stereo speakers
Cashmere (cashmere wool)
Orgin:
- Cashmere is a fiber collected from cashmere and other specific types of goat.
- clothing
- rugs
- carpet
Silk

Orgin:
- Silk comes from the cocoons of the larvae of the mulberry silkworm
- clothing
- upholstery
- wall coverings
- window treatments (if blended with another fiber)
- rugs
- bedding
- wall hangings
- parachutes
- bicycle tires
- comforter filling
- artillery gunpowder bags
- non-absorbable surgical sutures
Linen
Orgin:
- Linen is a plant fiber that comes from flax plants
- tablecloths
- dish towels
- bed sheets
- wallpaper/wall coverings
- upholstery
- window treatments
- clothing
- luggage
- canvases
- sewing thread
Cotton
Orgin:
- Cotton is a fiber that comes from the cotton plant
- absorbent bath towels
- clothing
- bed sheets
- yarn
- fishing nets
- coffee filters
- tents
- gunpowder
- cotton paper
- bookbinding
*http://easygofarm.net/sitebuilder/images/fiber_compare-480x296.jpg
~~~~~~~~~~~~~~~~~~~~~~~~~~~~~~~~~~~~~~~~~~~~~~~~~~~~~~~~~~~~~~~~~~~~~~~~~
Hair/fiber collection techniques
There are many techniques for collection of fibers and hair according to FBI's Douglas Deedrick.
- Methods for collecting fiber from carpets or upholstery
- Taping
- Shaking
- Scraping
- Picking
- Method for collecting hair from carpet and upholstery
- Special vacuums (FBI is very specific as you can see)
- Methods to help reduce the possibility of cross transfer
- Special lighting
- Magnification tools
~~~~~~~~~~~~~~~~~~~~~~~~~~~~~~~~~~~~~~~~~~~~~~~~~~~~~~~~~~~~~~~~~~~~~~~~~
Typical hair analysis.
When analysing a hair sample the team must first look at the basic structure of the hair to determine whether it came from a human of animal. Animal hair can look very similar to human hair. But, animal fur coloring is usually drastically changing called banding. While human hair has coloration throughout slightly changing in color, unless dyed. Then the hair root is analysed because animals have wide variety of shapes and humans almost 100% of the time have club shaped roots. Human hair can also tell you if the hairs belong to someone of Caucasian, Negroid and Mongoloid or European, African and Asian race. This can be very helpful during an investigation to narrow your search and if there is tissue attached you can find the peratrator with a DNA test.
*http://www.ehow.com/about_6102496_forensic-science_-hair-fiber-analysis.html
~~~~~~~~~~~~~~~~~~~~~~~~~~~~~~~~~~~~~~~~~~~~~~~~~~~~~~~~~~~~~~~~~~~~~~~~~
 Famous case where hair and fibers were used to convict a suspect
Ted Bundy
Ted Bundy was a serial killer responsible for 30+ murders. But there was
little that could be done with the small amount of evidence they had collected from victims in 1975 when they arrested him. In 1977 he escaped right before a murder trial in Colorado and he headed toward Florida. On his way he killed three more people early in 1978 the physical evidence in those cases led to his conviction. One of the most crucial pieces of evidence was the fibers found on 12-year-old Kimberly Leach that matched the fibers in his van. Bundy was executed in 1989.
*http://www.criminaljusticeschools.org/blog/10-famous-cases-cracked-by-forensicslittle that could be done with the small amount of evidence they had collected from victims in 1975 when they arrested him. In 1977 he escaped right before a murder trial in Colorado and he headed toward Florida. On his way he killed three more people early in 1978 the physical evidence in those cases led to his conviction. One of the most crucial pieces of evidence was the fibers found on 12-year-old Kimberly Leach that matched the fibers in his van. Bundy was executed in 1989.
~~~~~~~~~~~~~~~~~~~~~~~~~~~~~~~~~~~~~~~~~~~~~~~~~~~~~~~~~~~~~~~~~~~~~~~~~
Handwriting
History of handwriting analysis (Graphology)
1622 - Oldest known interest in hand writing analysis

1872 - Hypolite Michon gave hand writing analysis its name, graphology. Michon and Jules Crepieux-Jamin also attempted to relate specific handwriting elements to specific human traits.

1910 - Milton Newman Bunker began to study the graphology that began in Europe and realized that it was a “hit” or “miss” environment with major contradictions stated by various authors.
1915 - Bunker recognized that each of his students formed shorthand strokes in a unique manner. He suddenly and clearly realized that it was not the letter which had a trait meaning but the strokes – the shape of the formations within the letter.
After traveling thousands of miles, and interviewing thousands of people and examining more than half a million handwriting specimens in his lifetime, the copyrighted American System of handwriting analysis – Graphoanalysis was born.
* http://www.torontohandwritinganalyst.com/history.html
* http://wapedia.mobi/thumb/82ed508/en/fixed/470/201/Quiney_Flourish.png?format=jpg
* http://www.histoirepassion.eu/local/cache-vignettes/L150xH150/moton341-7edb1.gif
*http://www.igas.com/images/bunker_small.jpg
~~~~~~~~~~~~~~~~~~~~~~~~~~~~~~~~~~~~~~~~~~~~~~~~~~~~~~~~~~~~~~~~~~~~~~~~~
List of 12 handwriting characteristics

- Are the pen marks smooth and free flowing or shaky and wavering?
- This can be connected to the speed that the document was written at.
- Spacing of words and letters.

What is it the spacing between letters and words?
Is it consistent?
- Ratio of the relative height, width and size of letters.
- What is the ratio?
- Is it consistent?
- Pen lifts and separations.
- Does the person stop to form new letters and begin words?
- Forgeries may have lifts in unusual places.
- Connecting strokes.
- Are capitals connected to lowercase letters and are there connecting strokes between letters and words?
- Beginning and ending strokes.
- Are these straight,curled, long or short, an upstroke or a down stroke?
- Unusual letter formation.

- Are there any unusually formed letters such as backward, letters with a tail, or unusual capitals?
- Shading or pen pressure.
- Is the pen pressure on the upward or the downward strokes?
- Slant.

- Is slant left or right or straight up and down?
- Is there consistency between the slant of letters.
- Baseline habits.
- Is the writing above or below a line?
- Flourishes and embellishments.
- Are their any?
- If so what are they
- Diacritic placement.
- How are the t’s crossed?
- Take note of the dotting of i’s, j’s.
- For example are the dots to the right or left of the letter?
http://img4.realsimple.com/images/0907/pen-line-quality_300.jpg
http://img4.realsimple.com/images/0907/pen-slant_300.jpg
http://img4.realsimple.com/images/0907/pen-spacing_300.jpg
http://img4.realsimple.com/images/0907/pen-letter-formation_300.jpg
~~~~~~~~~~~~~~~~~~~~~~~~~~~~~~~~~~~~~~~~~~~~~~~~~~~~~~~~~~~~~~~~~~~~~~~~~

Forgery can be made in two ways by free hand or tracing. Freehand is when you try and replicate a persons handwriting with out trying to trace. Tracing like its name is when you use something like parchment paper and try to replicate a person signature through tracing. The neatness and fluidity of a forgery will to with the nervousness and artistic talent of the forager. I personally found it harder to freehand someone else's signature because everyone at my table had very bubbly handwriting, while I myself have very sharp handwriting.
http://www.csad.ox.ac.uk/csad/Newsletters/Newsletter10/forensic.2.gif
~~~~~~~~~~~~~~~~~~~~~~~~~~~~~~~~~~~~~~~~~~~~~~~~~~~~~~~~~~~~~~~~~~~~~~~~~
Reflection on the Check Forgery Activity

One part of hand writing analysis was to fill out a check with a fake name and then rip it up into pieces. Once they had been torn we were told to reassemble them and make an educated guess as to whom the check belonged at our table. Working with Amanda, Marissa, and Brad we were able to reassemble and correctly assign each check to its owner. The way the words were slanted and embellishments were the biggest distinguishing features. Our group found it fun to identify each others fake checks!
~~~~~~~~~~~~~~~~~~~~~~~~~~~~~~~~~~~~~~~~~~~~~~~~~~~~~~~~~~~~~~~~~~~~~~~~~
Research a famous forgery case and explain how forensic handwriting analysis was used to expose the forgery.

2. The Lindbergh KidnappingCharles Lindbergh Jr. a 20 month-old baby was kidnapped for a ransom of $50,000 dollars. The money was paid by his father who was a famous aviator but the baby was never returned. Later they found the baby a few miles from home, he was dead. They tracked the circulation of the bills used to pay the ransom and it lead them to Bruno Hauptmann. They found $14,000 in his garage which he claimed belonged to a friend. Handwriting analysts matched his writing to that on the ransom notes. Hauptmann was convicted and executed in 1936.
* http://www.criminaljusticeschools.org/blog/10-famous-cases-cracked-by-forensics
* http://cressida.websitewelcome.com/~weirdev/_images_stories/local7-4.jpg
~~~~~~~~~~~~~~~~~~~~~~~~~~~~~~~~~~~~~~~~~~~~~~~~~~~~~~~~~~~~~~~~~~~~~~~~~